

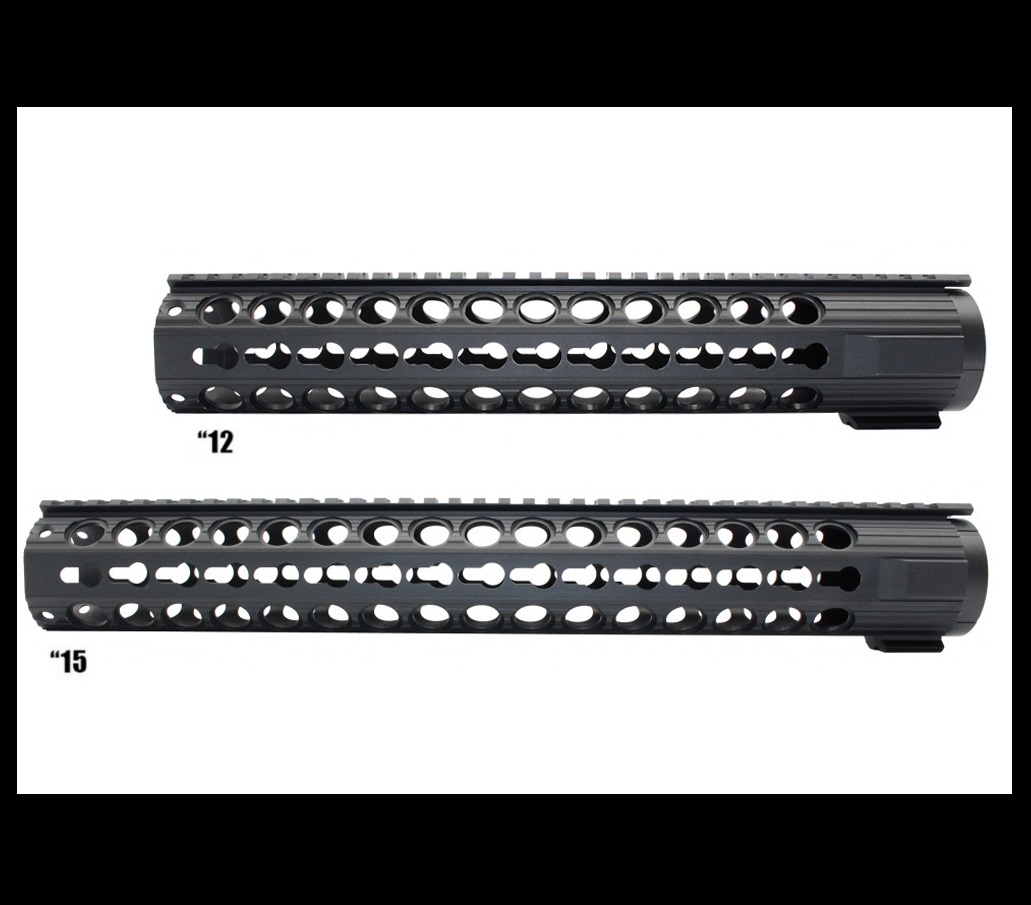
If you’re new to modifying your AR-15 or simply looking to upgrade your existing setup, installing an AR-15 handguard is a great place to start. The handguard plays a crucial role in both the functionality and aesthetics of your firearm, providing a surface for gripping the rifle, mounting accessories, and protecting your hands from heat during firing. Whether you’re switching to a free-floating handguard for increased accuracy or just upgrading your standard handguard for a more tactical look, this step-by-step guide will walk you through the installation process.
Tools and Materials You’ll Need
Before diving into the installation process, gather the following tools and equipment to ensure a smooth and successful installation:
- AR-15 Handguard (M-LOK, KeyMod, or Picatinny rail style, depending on your preference)
- Armorer’s Wrench (a multi-tool designed specifically for working on AR-15s)
- Torque Wrench (for precise torque on bolts and screws)
- Upper Receiver Vice Block (to securely hold your upper receiver in place during installation)
- Bench Vise
- Delta Ring Tool (optional, for removing standard handguards)
- Allen Wrenches (to secure screws on some handguards)
- Anti-Seize Compound (optional, to prevent threads from seizing up)
- Screwdriver Set
Step 1: Clear and Prepare Your AR-15
Safety is always the top priority when working with firearms. Before you begin, clear your AR-15 by removing the magazine and checking the chamber to ensure it’s empty. Once your rifle is safe and clear, place it on a sturdy, well-lit workbench.
For better maneuverability and access, it’s best to separate the upper receiver from the lower receiver. Push out the takedown pins to remove the upper receiver entirely.
Step 2: Secure the Upper Receiver
Using an upper receiver vise block is essential to avoid damaging your AR-15 during the handguard installation. Place the upper receiver into the vise block, then mount the block securely in a bench vise. This setup will hold your rifle steady while you work on it, minimizing the risk of slippage and ensuring a safe, precise installation.
Step 3: Remove the Existing Handguard
If your AR-15 currently has a drop-in handguard, you’ll need to remove it before installing the new one. For standard drop-in handguards, use a delta ring tool to compress the delta ring, which is the metal ring at the rear of the handguard. This ring holds the two halves of the handguard in place.
- Position the delta ring tool around the delta ring and squeeze to compress the spring.
- While holding the delta ring down, pull the handguard halves away from the barrel and remove them.
If your AR-15 is equipped with a free-float handguard, you may need to remove the barrel nut using an armorer’s wrench to loosen the handguard. Refer to your specific handguard’s manual for detailed removal instructions, as some systems vary slightly.
Step 4: Prepare for the New Handguard Installation
Once the old handguard is removed, inspect the barrel and gas block for debris or buildup. If necessary, clean the area using a soft cloth or brush. Depending on your new handguard’s compatibility, decide whether to keep or replace the gas block.
Ensure that all mounting surfaces are clean and free of any obstructions before moving forward.
Step 5: Install the Barrel Nut (For Free-Float Handguards)
For free-float handguards, the barrel nut is a key component. The barrel nut holds the barrel and the handguard together, so it must be torqued down properly to ensure reliability and accuracy.
- Slide the barrel nut over the barrel and align it with the receiver.
- Use an armorer’s wrench to torque the barrel nut to the manufacturer’s recommended specifications (typically between 30-80 ft-lbs.). Using a torque wrench is essential to apply the correct amount of torque and avoid overtightening, which can damage the threads or the nut.
- Once the barrel nut is securely in place, apply a thin layer of anti-seize compound to the threads if desired to prevent galling and seizing in the future.
Step 6: Align the Gas Block and Gas Tube
If you have installed a new free-float handguard, you’ll need to ensure that the gas block and gas tube are properly aligned.
- Slide the gas block onto the barrel, making sure the gas port is correctly aligned with the gas hole on the barrel.
- Tighten the set screws or clamp screws to secure the gas block in place. Make sure the gas tube aligns perfectly with the receiver’s gas tube hole. If the gas system is not aligned, your rifle may experience cycling issues after reassembly.
Step 7: Mount the New Handguard
Now it’s time to install your new AR-15 handguard. The steps will vary slightly depending on the type of handguard (drop-in or free-float).
For Drop-In Handguards:
- Position the front of the handguard into the handguard cap at the gas block.
- Compress the delta ring again using the delta ring tool and place the rear of the handguard into position.
- Release the delta ring, ensuring it holds the handguard securely in place.
For Free-Float Handguards:
- Slide the free-float handguard over the barrel and align it with the barrel nut.
- Most free-float handguards attach directly to the barrel nut using screws or a clamp system. Use the provided hardware and tighten the screws according to the manufacturer’s specifications. Be sure to check that the handguard is centered and aligned with the top rail of the upper receiver.
- If your handguard requires the use of locking screws, apply a small amount of thread-locking compound (such as Loctite) to ensure the screws remain tight during use.
Step 8: Reassemble the AR-15
With the new handguard securely installed, you can now reassemble your AR-15.
- Remove the upper receiver from the vise block and vise.
- Reattach the upper receiver to the lower receiver by aligning the takedown pins and pushing them into place.
Step 9: Test for Fit and Function
Once your AR-15 is reassembled, it’s crucial to test the fit and function of your new AR-15 handguard. Check the following:
- Ensure the handguard is properly seated and does not wobble or shift.
- Cycle the action to ensure that the gas tube is aligned and there are no obstructions.
- Attach any accessories (such as optics, lights, or grips) to the handguard’s rail system to ensure everything fits and functions as expected.
Step 10: Final Touches
After installing the handguard, perform a final inspection of your AR-15. Make sure the barrel nut is torqued correctly and the gas block is properly aligned. Clean any excess oil, anti-seize compound, or debris from the handguard and the barrel.
Why Upgrade to a New AR-15 Handguard?
Upgrading your AR-15 handguard can improve not only the look and feel of your rifle but also its overall performance. Some benefits include:
- Customization: Modern handguards offer various mounting options, such as M-LOK or KeyMod, which allow for the attachment of accessories such as lights, lasers, grips, and optics.
- Improved Heat Resistance: Quality handguards provide better heat shielding, making your rifle more comfortable to shoot for extended periods.
- Weight Reduction: Many free-float handguards are made from lightweight materials like aluminum, which can reduce the overall weight of your rifle.
- Enhanced Accuracy: Free-float handguards don’t touch the barrel, which can improve your rifle’s accuracy by preventing pressure on the barrel during firing.
Final Thoughts
Installing a new AR-15 handguard is a practical and satisfying way to enhance your rifle’s functionality and appearance. Whether you’re upgrading to a free-float handguard for accuracy or simply swapping out for a more tactical style, following these steps will help ensure a successful installation.
As always, take your time, follow safety procedures, and if in doubt, consult with a professional gunsmith. Once you’ve completed the installation, you’ll have a customized AR-15 that’s ready for the range, competition, or any mission you have in mind.